Books, again

Peruvian

book

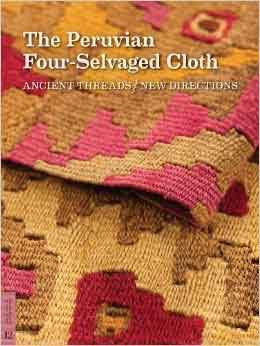
Books! I love books! This past week I have been glancing through and reading a couple of new books—to me, at least. Since I love all Peruvian textiles, when I read a book review in the current issue of Shuttle, Spindle and Dyepot, I had to have The Peruvian Four-Selvaged Cloth by Elena Phipps. Frankly, I was hoping to see some diagrams about how this cloth is made, but in glancing through the book, I did not see any. I have started reading it and am finding it very interesting, from the description of the weaving to the description of the dyeing. One of the things I found interesting is the use of looping within the weaving to produce texture in a piece. I had never heard of looping until I read Donna Kallner’s blog. She has classes, a book, and videos about this process. Maybe I’ll have to learn how in my spare time. Something else I like about this book is the section on modern weavers and their take on four-selvedge weaving. James Bassler and Sheila Hicks are two of the artists included in this section. If you do a search for Bassler, you’ll find many pages, but here’s a link to Craft in America page. The same could be said for Hicks, but here are a few sites: Pinterest, website, NY Times article. Disclaimer–I think the Pinterest site is a compilation from various pinners, but still interesting.

Mirrix-loom

measuring

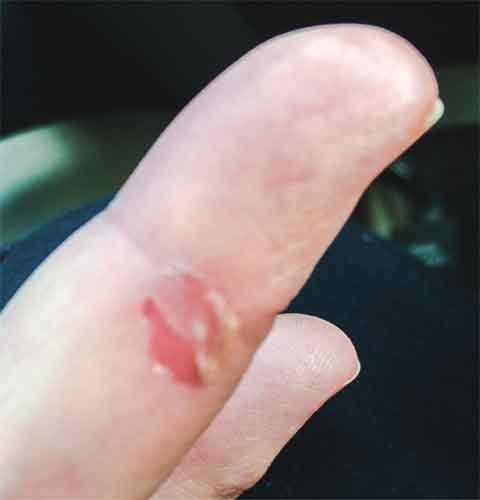
Now you might be wondering about the other picture on this page–More later…

October 6-12

©Sherri Coffey-ZigZagII

ZigZag II, hand-dyed with natural dyes, wool yarns, tapestry, 33.5 x 58 inches, private collection. ©Sherri Coffey-ZigZagII

A lot of things need to be done this week. In fact, ever since I hurt my knee, my life has been a quagmire, at least after I could walk again. There were physical therapy appointments, appointments to get shots in the knee, and eye appointments. All but the eye appointments are over with. The last surgery on my eye is tomorrow, then two more follow-up appointments, and I’m done.

Color-Thesaurus

In honor of fall, here’s a snippet of a Color Thesaurus by Ingrid Sundbird. You can see the whole thing here. It goes from white to black and all the colors in between, really quite interesting.

The weather is getting nicer and I’m feeling more energetic, although we are expected to have more days in the 90s this week. So, in addition of doing my knee exercises and walking, goals for the coming week are:

Studio

  • Finish work on Rain
  • Warp baby loom
  • Clean studio

House

  • Organize carport
  • Make a donation run to Goodwill
  • New toilet installed

Tasks

  • Eye operation
  • Post op appt
  • Attend two events on Friday, one at 4:30, other at 6:30

It’s happened again

Rain-in-progress

Weaving in progress

The ikat weaving is going amazingly fast, (maybe because I’m enjoying the trashy novel I’m listening to) although it may not be exactly as planned. The motifs are not always aligning in the expected places, but I just adjust and keep on weaving. The problem is my logic and math skills, or lack thereof.

I weave at 24 ppi, which means that there are 12 wraps around the selvedge threads.

Selvedge

Selvedge

Twelve wraps around a peg on the ikat board makes a really big bundle, and it’s hard to wrap that bundle to get a good, clean edge on the design motif. So I decided to wrap in 1/2 inch increments. For some reason, I had it in my head that my cartoon would need to be stretched by 2 in order to get the motifs the correct size in the weaving. So wrong! For the first time, I have been measuring the motif in the weaving and writing the size on the cartoon, along with measuring the design motif on the cartoon also. The most that those measurements have is a discrepancy of 1/2 inch–the weaving being larger. Keep in mind that this is a cartoon stretched two times its original size. Does this mean that if I had used the desired finished size in the cartoon and still wrapped the yarn for ikat in 1/2 groups, the weaving would be exactly that size? My head is spinning, and I guess the only solution is to try it. In the meantime, I have enough wrapped sections to weave another piece. Do I really want to weave the same thing again?

Cartoon

Cartoon


From this to….this

Dyeing was to begin, and it did, but not without a snafu first. The yarn was in the dye pots, burners turned on, and I went back inside and set the timer. When I went out again, the burners were off and the propane tank empty. I attached a new tank (which I know was full because it was so heavy) and nothing happened. A bit of flame, then nothing. So, off to the propane place to refill the first tank. By then it was too late in the day, so everything was started again the next morning.  I untied the first sections so that I can weave even it the other sections are not dyed yet.  My big fear now is that the sections are going to be in different dye baths. Even if everything is done carefully, each dye bath will vary somewhat in color.

Stretched yarn tied

Stretched yarn has been tied with the design. The cartoon is visible beneath the stretched yarn.

Ikat-tied yarn pile

Ikat-tied yarn pile

Dyed-ikat-ties

Dyed

Dyed-ikat-no-ties

Ties removed

Drying-ikat

Hanging to dry. From here, the sections are wound into balls and then put on a rug shuttle. The labels will remain until the section is ready to be woven.


Learning lessons

Ikat So, 10 boards just like this one have been stretched between the boards and the pattern has been tied.

Label, label, label!

Label, label, label!

Ikat-tied yarn pile

Ikat-tied yarn pile. The picture of the pile of yarn doesn’t show how high the pile is.

My method for a design that has been stretched to 128 inches is to cut it into sections. I label each one with the title of the piece, top and bottom, and the number of the section. As I worked on this particular design, I decided that I needed to also label the width of each design element and the centers. You can see all the labels if you click on the picture.

After stretching and tying the yarn, I also label the top and bottom (ask me how I learned to do that!). So I thought at least.

When I dye, I weigh each skein and then use a formula for how much dye and additives to use. That’s harder for me to do with ikat, since there are sections that are tied off and there is no need for dye there. I had first thought I would use a 4% solution to get an intense color, but I’ve decided to go with 3% to compensate for the tied off parts. So, I separated that pile into the individual sections and weighed each one.

Forgot to add the labels before taking off the board.

Forgot to add the labels before taking off the board.

That’s when I discovered that one section had no labels for the top and bottom of that section. I put all of the the cartoon pieces on the floor, along with its matching yarn section until I found the correct one.

The yarns are all weighed, the spreadsheet is ready … Dyeing begins soon!

More squares

Squares, ©Sherri Coffey

Squares, ©Sherri Coffey

Here’s what I cut off from that horrible warp that I wrote about here. The warp doesn’t seem to affect the finished product, though.

I like the design except for one thing– the first group of diagonal squares on the right is the wrong color. That particular blue is too close in value to the background and becomes hidden. I’ve written about value before here. It’s often a problem of mine.

What could the title for this piece be? Hiding in Plain Sight? For now it’s just Squares.

Not much

Ikat in progress

Ikat in progress

Really not much going on around here. The ikat piece that I’m working on is going to be part of the idea for a prairie series. I had the cartoon enlarged to 120 inches, but after winding and tying the first section, I measured the actual vertical space available (Duh!) and cut the rest of the enlargement into 13-inch sections. Keeping my fingers crossed that my math is correct! As you can see, the ikat part is pretty simple–vertical lines, spread out. My process for this is pretty simple also. I have two huge cones of the wool that I use, so I wind a ball with doubled strands on my wonderful new ball winder, then measure on the ikat board, then tie. It takes about 300 grams for each section. Knowing that will make the dyeing more precise later on. Now if I could just get all my water faucets to behave themselves!

How I spent my weekend

Race-Street-2014 Another season, another pop-up gallery. There was even a writeup in the paper this morning about the new pop-ups making Gallery Night a bit more interesting. Maybe even worth getting out in the heat of early September.

Weather-pieces

Top: West Texas Snowfall, 2014, Bottom: Tornadoes Possible ©2014 Sherri Woodard Coffey

©Sherri Coffey-Prairie Fire

Prairie Fire, Weft-faced ikat, ©2014 Sherri Woodard Coffey

It’s always interesting to see the variety of art in these pop-ups, so very eclectic. I took my two weather pieces, although no one but me thought of them as weather maps. To others, they’re just bright colors and abstract. Good enough. It’s hard to decide about work to be included, but I decided on Prairie Fire and Illusion.

Doing this kind of gallery is not the easiest thing to do. The buildings that house the pop-ups have usually been empty for a while. So, there’s clean up, vacuuming, windows, measuring and hanging work. Then there’s the event itself, with take down on the following day.

Illusion, hand-dyed wool tapestry, 48 x 28 inches

Illusion, hand-dyed wool tapestry, 48 x 28 inches, ©2014 Sherri Woodard Coffey

The perils of warping

warping-finger I’m really not making a rude sign in this picture. In the middle of retying the linen warp for the next project, I noticed this big friction blister that had already had the skin rubbed off.  This warp had so many problems that I investigated ways to warp differently. Katie Reeder Meek’s book  Warping with a Trapeze and Dance With Your Loom came to mind first. Here’s a bit about her technique from a participant in one of her workshops. Purrington makes a trapeze that fits all looms. I also read some articles about a “warping valet, which is kind of the same principle as the trapeze. Warped for Good is a blog that has pictures and a video. She also has an Etsy shop.

Laura Fry has several posts on her blog about her “warping valet.”  I’m going to peruse all of those more closely if the new tie-on doesn’t solve my problems. So far the warp looks good, with no loose ends drooping down in slackness. It’s going to be a while before weaving starts because the next piece is going to be ikat, and that requires tying, dyeing, and untying. I’m looking forward to weaving it though.

Now for the good news about this linen warp–I really like the heft it gives to the finished piece and the sheen and the smoothness (sometimes called slippery by me) of the yarn. Ends will be woven in today.

Decisons

Side view of gallery wrapped canvas with fabric stapled on to it. West Texas Snowfall sewn onto the fabric.

Side view of gallery wrapped canvas with fabric stapled on to it. West Texas Snowfall sewn onto the fabric.

Yesterday I heard an interview with Daniel J. Levin about his book The Organized Mind: Thinking Straight in the Age of Information Overload. I was doing errands, so I only got bits and pieces at any one time. A few of things that I able to hear:

  1. we need to let our minds wander and
  2. highly successful people make decisions fast
  3. don’t worry if we’re using Google as our second memory bank

I had already stopped worrying about my lack of remembering things that I had looked up. My brain is being used for other things, and the file cabinet is full. I realize the benefits of letting our minds wander, although I don’t do it as much as I should. When I take my morning Old stapler walk (which is on hold right now), things that I had been thinking about suddenly become clear and a decision is in sight. Which brings me to decisions. This is hard for me. I research. I look at the pros and cons. I waffle this way and that.

In a roundabout way this brings me to one small decision–to buy an electric stapler. I had looked them up, thought about it, and never done it. Every time I got boards ready for hanging pieces and used the old stapler that was around during the revolution. I wondered why I hadn’t bought a new one. So, I did, and I love it! I’m not getting boards ready, I’m stapling fabric to a gallery wrapped canvas. It’s wonderful! And electric. Very easy on the hands.

Note the packaging. Grrrr...

Note the packaging. Grrrr…

Now, the getting the fabric in place still needs practice, but the stapler works great. The hardest part was getting it out of its container. But that’s another day, another rant.