Category Archives: Weaving

On to new things

Since I posted last week about the show I’m not going to in Atlanta, I feel better about my decision. West-Texas-Snowfall It’s all about that trusting your gut thing. Several people have contacted me, some who have actually lived in Atlanta, and told me I made the right decision. So, on to new things!

After a few days of travel, I am going to come back home and do a couple of small weavings on the big loom. Although I am much happier weaving on the Mirrix, I still just enjoy the big loom better. I think it’s the rhythm I get into there, and that might come on a small loom too, given more practice.

So, what’s on tap next? I’m going to weave two-at-a-time faces. They may not be successful at the sett I use normally, but I can certainly stop and move on to something else. The other studio task ahead is how to mount a small piece more successfully, namely the weather pieces. I am definitely not happy with the presentation below.

Side view of gallery wrapped canvas with fabric stapled on to it. West Texas Snowfall sewn onto the fabric.

Side view of gallery wrapped canvas with fabric stapled on to it. West Texas Snowfall sewn onto the fabric.

Glasbrook In Kirsten Glasbrook’s book, she shows how she finishes and mounts shaped pieces by sewing the piece onto a piece of linen, and then stretches the combined linen and tapestry over a piece of block board. I had never heard of blockboard, so had to look it up–here’s a page with pics and definitions. I think I’ll try a thin piece of plywood. Masonite might work, but it’s a dark color. Don’t know about that.

Another tapestry book

Tapestry-Soroka it’s is really embarrassing, but this book has been on my shelf for a while, and I haven’t looked at it. Actually probably not on the shelf for too long because I just organized my books. But still, it’s been in my house. It’s a beautiful book with some gorgeous pictures in it! There’s a bit of instruction, definitions of terms, etc, alternative materials, but one of the things I like is that  the captions under the pictures give the epi of the piece. Why that matters to me I don’t know, but it does. Maybe because I weave at 4 epi, so it’s nice to see what other setts enable one to do. Anyway, check out Tapestry Weaving by Joanne Soroka. There’s a lot of eye candy!

By the way, when I went to Amazon to get a link for the book, they kindly told my that I “purchased this item on May 15, 2012.” So, yes, it has been in my house for a while.


Mirrix again

Mirrix-loom

mirrix

Mirrix-warp

Mirrix with warp

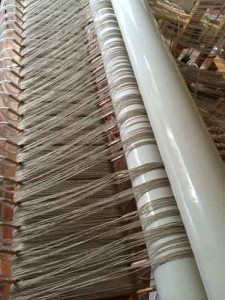
My Mirrix is out again, after a long hibernation. I have decided to conquer this. Others rave about their small Mirrix looms, so I know it’s just me. Practice, practice, practice! I have looked at various sources for information. Of course, Mirrix has a great little PDF booklet about warping your loom. They also have a really good video. But here’s the problem–even though I knew exactly where my loom was, some of it’s vital parts were missing, things like the warping bar and the spring that spaces the warp. Luckily, I had ordered a bottom spring set, so one of those went to the top. Then I looked at alternate ways to warp, something that did not require the warp bar. Kathe Todd-Hooker has written a blog post about warping the Mirrix her way–and that’s what I did. I also ordered the parts that I need for my loom.

Now, what to weave. I have lots of ideas for small pieces, at least I did before I warped up. I’m sure they will come to me. There may even be a list somewhere,


Books, again

Peruvian

book

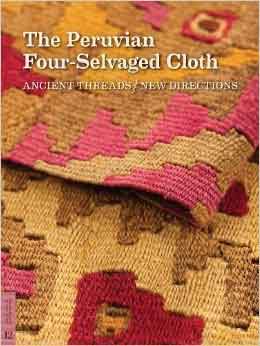
Books! I love books! This past week I have been glancing through and reading a couple of new books—to me, at least. Since I love all Peruvian textiles, when I read a book review in the current issue of Shuttle, Spindle and Dyepot, I had to have The Peruvian Four-Selvaged Cloth by Elena Phipps. Frankly, I was hoping to see some diagrams about how this cloth is made, but in glancing through the book, I did not see any. I have started reading it and am finding it very interesting, from the description of the weaving to the description of the dyeing. One of the things I found interesting is the use of looping within the weaving to produce texture in a piece. I had never heard of looping until I read Donna Kallner’s blog. She has classes, a book, and videos about this process. Maybe I’ll have to learn how in my spare time. Something else I like about this book is the section on modern weavers and their take on four-selvedge weaving. James Bassler and Sheila Hicks are two of the artists included in this section. If you do a search for Bassler, you’ll find many pages, but here’s a link to Craft in America page. The same could be said for Hicks, but here are a few sites: Pinterest, website, NY Times article. Disclaimer–I think the Pinterest site is a compilation from various pinners, but still interesting.

Mirrix-loom

measuring

Now you might be wondering about the other picture on this page–More later…

Learning lessons

Ikat So, 10 boards just like this one have been stretched between the boards and the pattern has been tied.

Label, label, label!

Label, label, label!

Ikat-tied yarn pile

Ikat-tied yarn pile. The picture of the pile of yarn doesn’t show how high the pile is.

My method for a design that has been stretched to 128 inches is to cut it into sections. I label each one with the title of the piece, top and bottom, and the number of the section. As I worked on this particular design, I decided that I needed to also label the width of each design element and the centers. You can see all the labels if you click on the picture.

After stretching and tying the yarn, I also label the top and bottom (ask me how I learned to do that!). So I thought at least.

When I dye, I weigh each skein and then use a formula for how much dye and additives to use. That’s harder for me to do with ikat, since there are sections that are tied off and there is no need for dye there. I had first thought I would use a 4% solution to get an intense color, but I’ve decided to go with 3% to compensate for the tied off parts. So, I separated that pile into the individual sections and weighed each one.

Forgot to add the labels before taking off the board.

Forgot to add the labels before taking off the board.

That’s when I discovered that one section had no labels for the top and bottom of that section. I put all of the the cartoon pieces on the floor, along with its matching yarn section until I found the correct one.

The yarns are all weighed, the spreadsheet is ready … Dyeing begins soon!

More squares

Squares, ©Sherri Coffey

Squares, ©Sherri Coffey

Here’s what I cut off from that horrible warp that I wrote about here. The warp doesn’t seem to affect the finished product, though.

I like the design except for one thing– the first group of diagonal squares on the right is the wrong color. That particular blue is too close in value to the background and becomes hidden. I’ve written about value before here. It’s often a problem of mine.

What could the title for this piece be? Hiding in Plain Sight? For now it’s just Squares.

The perils of warping

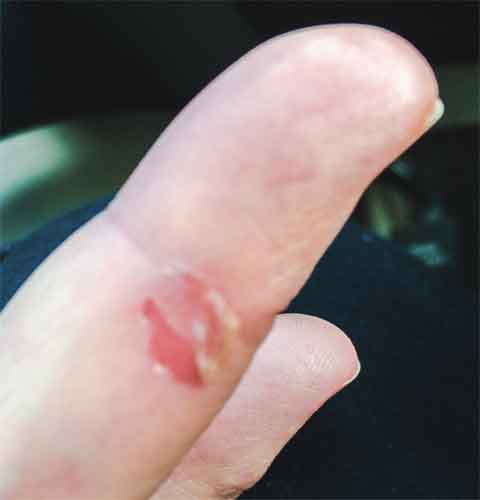
warping-finger I’m really not making a rude sign in this picture. In the middle of retying the linen warp for the next project, I noticed this big friction blister that had already had the skin rubbed off.  This warp had so many problems that I investigated ways to warp differently. Katie Reeder Meek’s book  Warping with a Trapeze and Dance With Your Loom came to mind first. Here’s a bit about her technique from a participant in one of her workshops. Purrington makes a trapeze that fits all looms. I also read some articles about a “warping valet, which is kind of the same principle as the trapeze. Warped for Good is a blog that has pictures and a video. She also has an Etsy shop.

Laura Fry has several posts on her blog about her “warping valet.”  I’m going to peruse all of those more closely if the new tie-on doesn’t solve my problems. So far the warp looks good, with no loose ends drooping down in slackness. It’s going to be a while before weaving starts because the next piece is going to be ikat, and that requires tying, dyeing, and untying. I’m looking forward to weaving it though.

Now for the good news about this linen warp–I really like the heft it gives to the finished piece and the sheen and the smoothness (sometimes called slippery by me) of the yarn. Ends will be woven in today.

Butterflies everywhere

butterflies Butterflies everywhere. I’m afraid to time how long it takes me to weave one inch. Maybe I’ll get brave today and do that, between all the appointments. I’ve also not timed how long it takes to perform all the physical therapy exercises that I’m doing. No matter, they’re helping. I can raise the harnesses and weave in those butterflies. That’s all that matters.

Last Friday was the opening of

ZigZag, tapestry, hand-dyed wool and mohair on cotton warp 62 x 29 inches ©Sherri Coffey all rights reserved

ZigZag, tapestry, hand-dyed wool and mohair on cotton warp 62 x 29 inches ©Sherri Coffey all rights reserved

the Texas Artists Coalition exhibit. I wish I had taken pictures, but I didn’t. Maybe I’ll go again and take a few. There were also other exhibits that I’d like to see. These are the pieces selected by the juror.

Door, tapestry, hand-dyed wool on cotton warp 50 x 28 inches ©Sherri Coffey all rights reserved

Door, tapestry, hand-dyed wool on cotton warp 50 x 28 inches ©Sherri Coffey all rights reserved

Linen warp problem…solution?

Taken directly facing the loom

Taken directly facing the loom

Same set-up from different angle.

Same set-up from different angle.


Yep, this is my first time using linen as warp. And yes, this is embarrassing to relate, but … What I thought was my perfectly tensioned–okay, not perfectly, but good–warp is not so much. I consistently had some loose warps, which is a problem when that warp in the interlock warp. First I tried hanging weights from the offending warps. Didn’t work so well. Then I had the brilliant idea of raising those warps and inserting a stick. Better, but they moved when I advanced the warp. Duh!

Several sticks, pulled down closer to the warp beam. So far, so good.

( Several sticks, pulled down closer to the warp beam. So far, so good.

They worked best when the sticks rested on the beam above the warp beam. More sticks, new location. Works! By the way, I am the full 60 inches of the warp width. All the ends are through the heddles and reed, but the extra width hangs in front when it’s not being used. When I finish a piece, I cut off the extra part also and use that to measure how much of the warp I’ve used.

(Each peg of the sectional warp beam has tubing over it in the hope that warps won’t get tangled or caught on the pegs. Only works sometimes.)

Organized chaos


From Hokett Would Work

Lease stick holders from Hokett Would Work

This is how things looked after getting the warp on the beam and before tying to old warp.

This is how things looked after getting the warp on the beam and before tying to old warp.

I’m sure others can do this whole warping and tying on to an old warp in a much neater way. Maybe I’ll be able to do it also after another few dozen efforts, because I learn something NOT to do every time.

Before all the tying of warp ends, here’s what it looked like. A little less chaotic. The lease sticks had been inserted into the old warp and placed into the lease stick holders. Then the whole business of tying individual ends.


WarpChaos

After all the ends are tied–total chaos!

LinenWarp

The linen is being used double and the old warp is single.

The tah dah moment after all the knots have passed through the heddles and reed. Doesn’t a warp look good on the warp beam coming over the back beam?

On and my careful calculations as for as warp needs? Wrong! But the error has been corrected for the future. My spreadsheet:  Spreadsheet So what did I learn this time?

 Tying old warp to new 

  • Insert lease sticks while old warp is attached to apron rod and under tension
  • Masking tape to hold ends down on lease sticks
  • Use lease stick holders http://wouldworkifhewantedto.wordpress.com/2013/04/06/lease-stick-holders/
  • Cut old warp in front of reed, knot in groups of 8
  • Wind warp using warping wheel
  • Wind extra end for each selvedge
  • Trim ends of warp before taping ends to warp in section
  • Tie each new end to old end

Had to add one last thing. Linen is very slippery. I had been told that but didn’t really consider it. This is the first warp that I’ve had that will just slip out of the heddles as you work on one of its neighbors!